So, you want to be a Twitch streamer? Whether you want to showcase high-level gameplay, create live art, or simply foster a tight-knit community through “Just Chatting” sessions, there has never been a more accessible time to start. However, “going live” involves significantly more than just hitting a broadcast button. It requires a blend of technical reliability, engaging performance, and strategic marketing.
In this comprehensive guide, we’ll walk through the essential gear you need to look and sound professional, the software configurations that ensure a smooth broadcast, and the secret sauce to growing an audience from zero to a thriving community.
1. The Essential Streaming Checklist
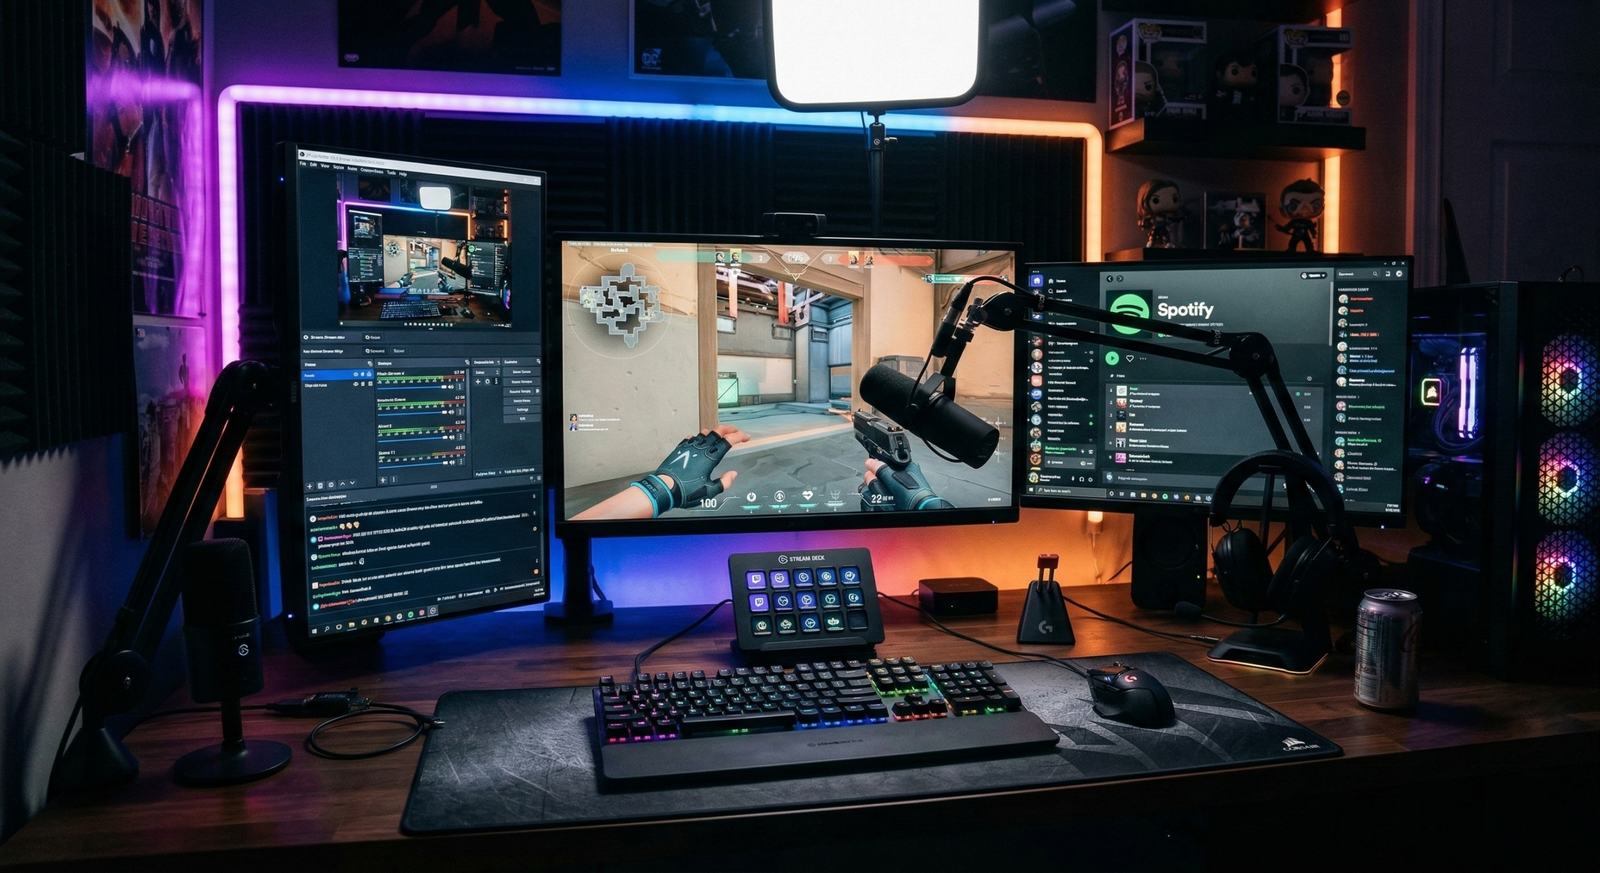
You don’t need a $5,000 dual-PC setup to get your start, but you do need reliability. If your stream crashes or lags, viewers will quickly migrate to another channel. Here is the foundational hardware you’ll need:
The PC or Console
- PC: Aim for at least an Intel i5 or AMD Ryzen 5 processor coupled with 16GB of RAM. While the CPU handles the logic, a dedicated GPU is vital for encoding. An Nvidia RTX series card is highly recommended because of the NVENC encoder, a dedicated piece of hardware on the GPU that handles the video compression so your game performance doesn’t suffer.
- Console: Modern systems like the PS5 and Xbox Series X/S have robust built-in streaming capabilities that allow you to go live directly from the UI. However, if you want to add professional overlays, alerts, and better audio control, you will eventually want to connect your console to a PC using a Capture Card (like the Elgato HD60 X).
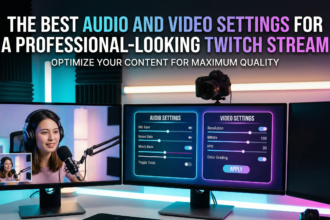
The Audio (The Make-or-Break Factor)
Veteran viewers often say they will “watch” a bad 480p video feed if the personality is great, but they will “mute and leave” immediately if the audio is distorted, quiet, or filled with background noise. High-quality audio is the cornerstone of viewer retention.
- Recommendation: Blue Yeti USB Microphone – This remains the industry standard for beginners. It features multiple pickup patterns (like cardioid mode, which ignores sound behind the mic) and is purely plug-and-play, providing a rich, “broadcast” tone without needing an expensive XLR interface.
The Visuals
While your gameplay is important, Twitch is a social platform; viewers come to see your reactions to the game.
- Webcam: A clear camera helps build a parasocial connection. Let them see your facial expressions when you win a difficult boss fight or react to a funny chat message.
- Recommendation: Logitech C922x Pro Stream – It handles 1080p at 30fps or 720p at a smooth 60fps. It is particularly valued for its “no-fuss” autofocus and decent performance in typical bedroom lighting.
- Lighting: Avoid relying on a standard ceiling light, which creates “raccoon eyes” (heavy shadows under the brow). A simple ring light or key light placed at a 45-degree angle to your face makes you look professional and helps your webcam’s sensor reduce “noise” or graininess in the video.
- Recommendation: Elgato Key Light – This is a professional-grade, flicker-free LED panel that is app-controlled, allowing you to adjust brightness and color temperature directly from your desktop.
The Extras
- Stream Controller: Elgato Stream Deck + – While not strictly “required,” it acts as a physical switchboard for your stream. Instead of fumbling with your mouse to change scenes or mute your mic, you can trigger complex actions—like playing a sound effect or posting a link to your Discord—with a single button press.
2. Choosing Your Software
Your software is the “bridge” that packages your gameplay, camera feed, and microphone audio into a single stream and sends it to Twitch’s servers.
- OBS Studio (Free/Open Source): This is the gold standard. It is lightweight and incredibly powerful. Because it is open-source, there are thousands of free plugins available to add custom features like “move transitions” or advanced audio filters. It has a steeper learning curve, but mastering it gives you total creative freedom.
- Streamlabs Desktop: Built on the OBS engine, this version simplifies the process by integrating your alerts (like “New Follower” pop-ups) and chat directly into the software. It is more resource-heavy than OBS but is much faster to set up for a first-time user.
- Twitch Studio: Specifically designed for newcomers, this software scans your hardware and automatically suggests the best settings. It’s perfect if you want to test the waters without learning about bitrates and encoders immediately.
3. Step-by-Step: How to Go Live
- Create a Twitch Account: Choose a username that is easy to remember and spell. Crucial: Enable Two-Factor Authentication (2FA) immediately—Twitch will not provide you with a stream key until your account is secured.
- Get Your Stream Key: This is your “digital ID” for broadcasting. Find it in your Twitch Creator Dashboard under Settings > Stream. Keep this key secret; anyone with this key can broadcast to your channel.
- Configure Your Software: Open your chosen software and navigate to the “Stream” settings. Select Twitch as your service and paste your Stream Key (or “Connect Account” for an even faster setup).
- Add Your Sources: Create a “Scene” and add your sources. Usually, this means an “Application Audio Output” for game sound, a “Game Capture” for the visuals, and a “Video Capture Device” for your webcam. Arrange them so your webcam doesn’t block important game UI like the mini-map or health bar.
- Optimize Your Bitrate: Your bitrate determines the quality of your video. For a crisp 1080p/60fps stream, you generally need an upload speed of at least 10 Mbps to support a 6,000 kbps bitrate. If your internet is slower, dial it back to 720p/30fps at 3,000 kbps to prevent buffering for your viewers.
- The Final Check: Do a “test stream” or record a 5-minute clip locally to ensure your mic isn’t being drowned out by the game music. If everything sounds balanced, hit “Start Streaming”!
4. 5 Tips to Grow Your Audience
The most difficult hurdle for any new streamer is moving from 0 to 5 viewers. Since Twitch’s “Recommended” algorithm is notoriously difficult for new creators, you must be proactive.
1. Master “Category Surfing”
If you stream the top-tier games like League of Legends, Call of Duty, or Valorant, you will be buried at the bottom of a list of thousands of streamers. To get discovered, look for “Goldilocks” games: titles that have a loyal following (2,000–5,000 total viewers) but only a handful of active streamers. When a popular streamer in that category goes offline, their viewers will look for someone else to watch—and you’ll be right at the top of the list.
2. The “Empty Room” Rule: Talk Constantly
Streaming to zero viewers is a skill. You must narrate your thoughts as if 1,000 people are watching. If a potential viewer clicks on your stream and sees you sitting in silence for 20 seconds, they will leave before you even realize they were there. Explain your strategy, complain about a difficult level, or talk about what you had for lunch—keep the audio “active” at all times.
3. Consistency Over Intensity
It is better to stream for 2 hours, three times a week, than to stream for 12 hours once a month. Create a schedule and post it in your channel panels. When viewers know exactly when to find you (e.g., “Horror Games every Tuesday at 8 PM”), they can integrate your stream into their weekly routine, turning them from “passers-by” into “regulars.”
4. Leverage Vertical Content
Twitch has very little organic “discovery” for small channels. Your growth will largely happen off Twitch. Use a tool like JoinCombo or Streamladder to turn your best funny or high-skill moments into vertical videos for TikTok, YouTube Shorts, and Instagram Reels. These platforms have powerful algorithms that can put your face in front of millions of people who have never heard of you.
5. Cultivate “The Third Place”
People don’t stay on Twitch just for the gameplay; they stay for the community. Treat your chat like a group of friends. Remember the names of your regulars, ask how their day was, and use “Channel Points” to let them interact with you (e.g., “500 points to make the streamer drink water”). When viewers feel seen and valued, they become your most loyal brand ambassadors.
5. Monetization: Turning Fun into Funds
Streaming is a marathon, not a sprint. Once you reach Twitch Affiliate status—which requires 50 followers and an average of 3 viewers over 30 days—you unlock several revenue streams:
- Subscriptions: This is the most stable income. Viewers pay a monthly fee (starting at $4.99) to support you, receiving custom emotes and ad-free viewing in return.
- Bits and Cheers: These are virtual tips. Viewers buy Bits from Twitch and “Cheer” them in your chat. For every Bit cheered, you receive exactly $0.01.
- Ad Revenue: Twitch will run ads on your channel. While the payout per 1,000 views (CPM) is generally low for small streamers, it adds up as your audience grows.
- Direct Sponsorships: Once you have a consistent audience, brands may pay you to play their game, wear their apparel, or feature their products on your desk.
One Comment